how to decrypt browser data?
在很多时候,当我们进行登录或其他输入操作时,浏览器会弹窗提示我们要不要保存密码或其他凭据到浏览器,我们时常为了方便而不假思索的点击确定按钮,但这也会带来安全风险,下面将介绍如何对浏览器存储的密码等敏感信息进行解密
Chrome浏览器解密原理
从 Chrome 80 开始,某些版本开始使用更复杂的加密机制(AES-GCM),此时密码不再直接使用 DPAPI 加密,而是使用一个由 DPAPI 保护的密钥。
什么是DPAPI?
DPAPI(Data Protection API)是Windows操作系统提供的一组应用程序编程接口(API),用于加密和解密数据。它的主要目的是帮助开发者保护敏感信息,如密码、密钥或其他私密数据,使得这些数据即使在存储或传输过程中被截获,也无法被轻易解读。
🧩 DPAPI 的核心功能
DPAPI 提供了两个主要函数:
- CryptProtectData
用于**加密数据**
- 输入:原始明文数据(
DATA_BLOB)、可选描述字符串、可选附加熵(entropy)、其他标志 -
输出:加密后的数据(
DATA_BLOB) -
CryptUnprotectData
用于**解密数据**
- 输入:加密后的数据(
DATA_BLOB)、可选描述字符串、可选附加熵(entropy)、其他标志 - 输出:解密后的明文数据(
DATA_BLOB)
🔐 加密机制说明
DPAPI 使用用户的登录凭据(如用户密码的哈希值)作为主密钥的一部分来生成加密密钥。这意味着:
- 只有同一用户在同一台机器上可以解密数据
- 如果用户更改了密码,可能无法再解密之前加密的数据(除非使用了额外的熵)
- 数据加密与用户账户绑定,增强了安全性
应用场景
- IE、Chrome的登录表单自动完成
- Powershell加密函数
- Outlook, Windows Mail, Windows Mail, 等邮箱客户端的用户密码。
- FTP管理账户密码
- 共享资源文件夹的访问密码
- 无线网络帐户密钥和密码
- 远程桌面身份凭证
- EFS
- EAP/TLS 和 802.1x的身份凭证
- Credential Manager中的数据
- 以及各种调用了CryptProtectData函数加密数据的第三方应用,如Skype, Windows Rights Management Services, Windows Media, MSN messenger, Google Talk等。
旧版Chrome内核浏览器
旧版本的Chromium仅使用登录数据和DPAPI。所有密码都通过DPAPI的CryptProtectData进行加密,并通过CryptUnprotectData进行解密。这几乎不难破解,因为Chromium会在存储在SQLite3数据库中的每个密码前加上“DPAPI”前缀。
Chrome 将密码存储在一个 SQLite 数据库中:
- 路径示例:
C:\Users\<用户名>\AppData\Local\Google\Chrome\User Data\Default\Login Data
你可以使用 SQLite 工具或 Python 的 sqlite3 模块读取这张表:
import sqlite3
# 打开数据库
conn = sqlite3.connect('Login Data')
cursor = conn.cursor()

# 查询加密密码
cursor.execute("SELECT origin_url, username_value, password_value FROM logins")
for row in cursor.fetchall():
  print(row)
输出中的 password_value 是一个加密的 blob 数据。
解密密码(使用 Windows DPAPI)
使用 win32crypt.CryptUnprotectData 来解密:
import win32crypt
encrypted_password = row[2]  # 从数据库中获取的加密密码
decrypted_password = win32crypt.CryptUnprotectData(encrypted_password)
print("Decrypted password:", decrypted_password[1].decode('utf-8'))
解密流程总结
直接使用 Windows DPAPI (CryptProtectData) 加密密码
- 关键文件路径:
| 文件 | 路径 |
|---|---|
| 加密密码数据库 | C:\Users\用户名\AppData\Local\Google\Chrome\User Data\Default\Login Data |
- 解密流程步骤:
| 步骤 | 操作 | 说明 |
|---|---|---|
| 1 | 读取Login Data数据库 |
查询logins表中的password_value字段 |
| 2 | 使用CryptUnprotectData解密 |
输入加密的 blob 数据,返回明文密码 |
| 3 | 输出明文密码 | 成功获取用户密码 |
新版Chrome内核浏览器
浏览器数据目录是homeDir +"/AppData/Local/Google/User Data/",用户的默认profile文件为Default,如下图该目录下存储着浏览器的各种数据库文件。
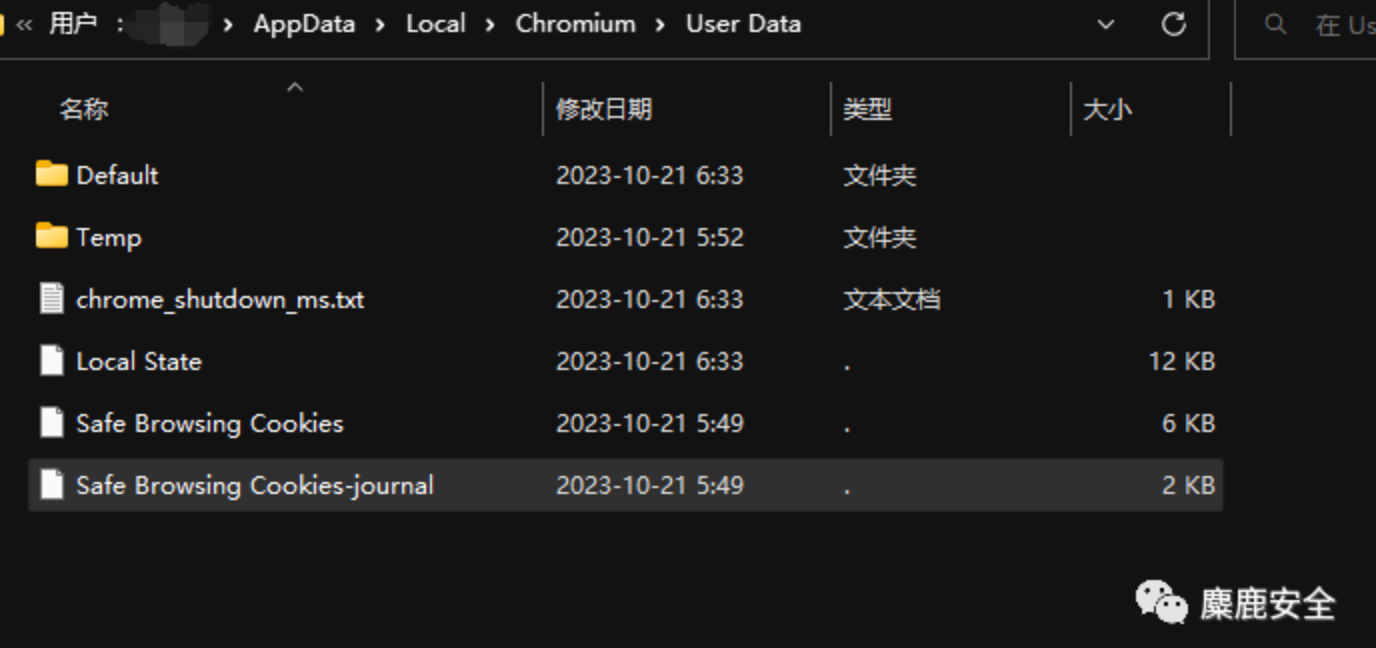
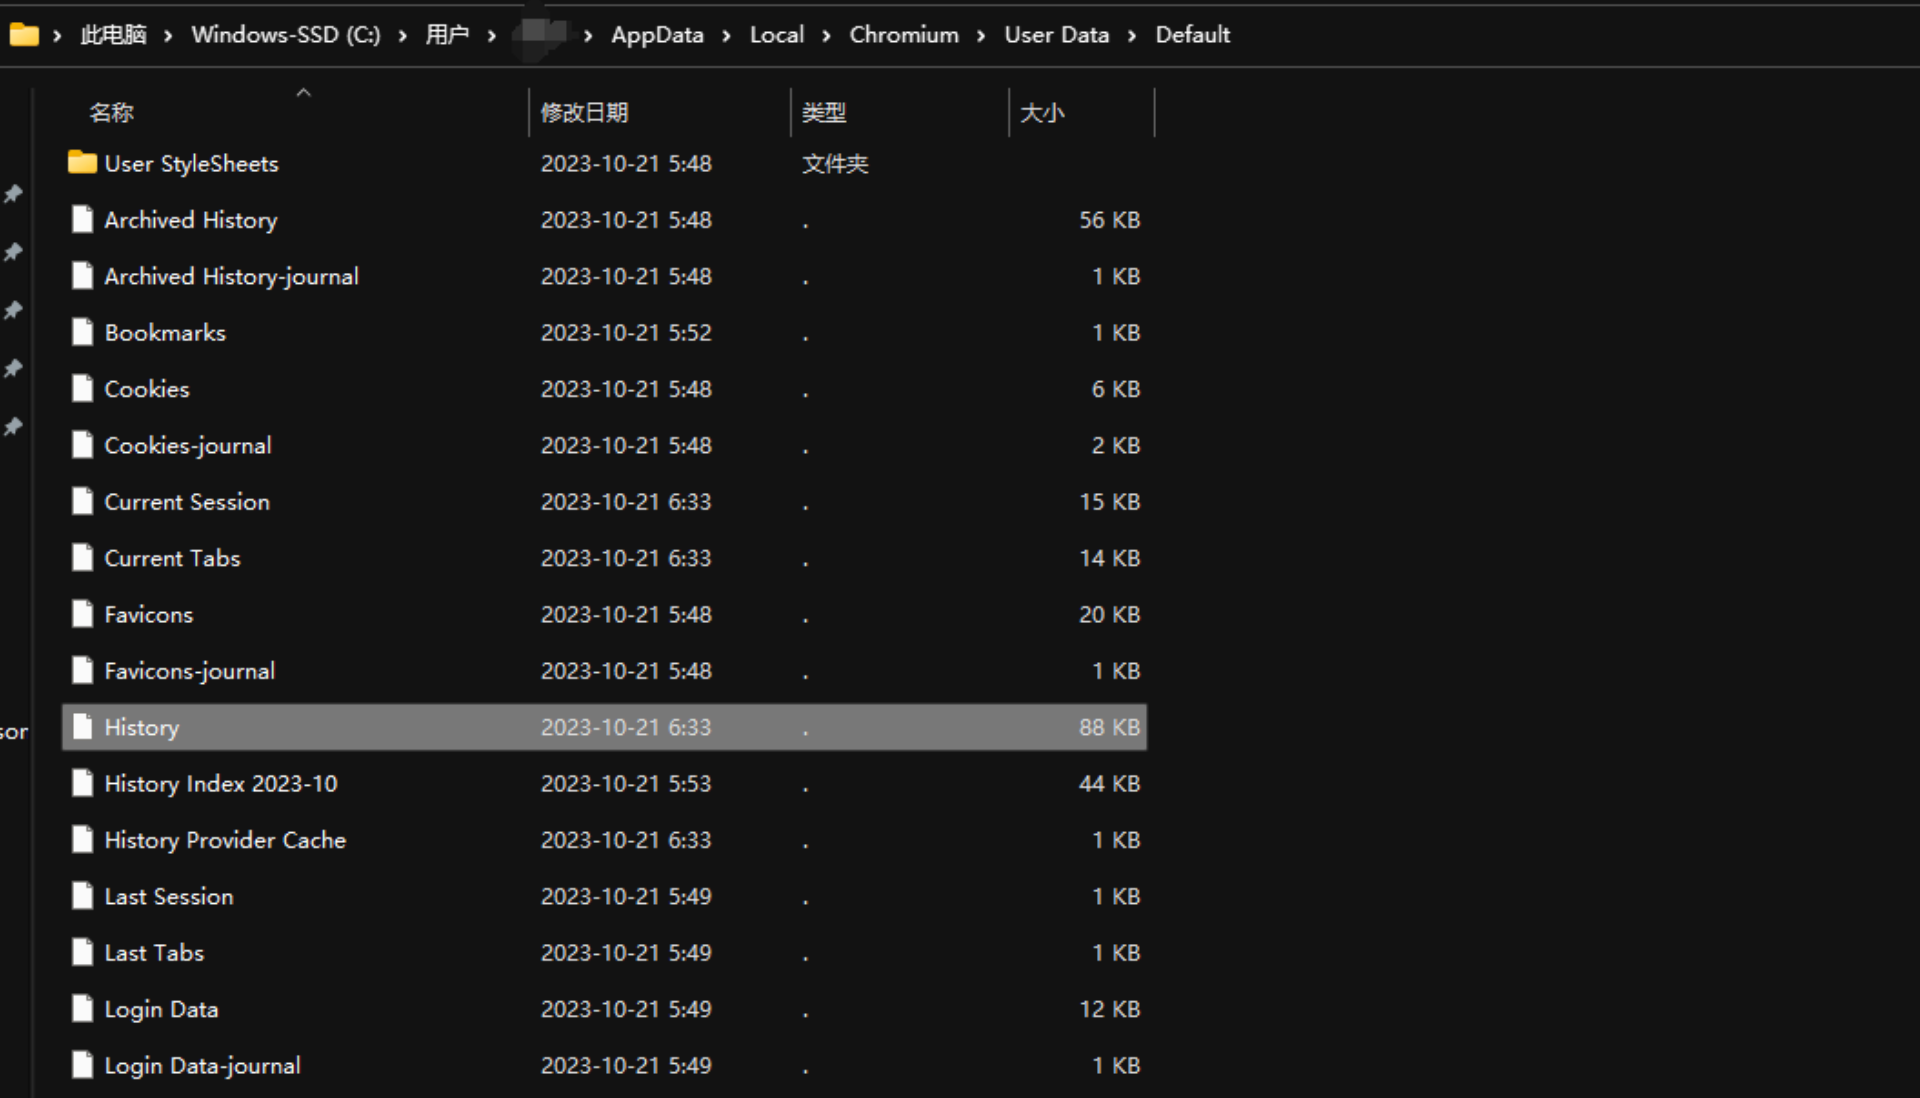
其中cookies和password为DPAPI加密,历史记录明文存储,可直接读取
时光荏苒,如今Chromium有了新的方式。浏览器首次启动时,它会访问本地状态JSON文件,并提取加密形式的内部密钥。然后,它会调用DPAPI的CryptUnprotectData函数来解密内部密钥。这是我们在此过程中最后一次看到DPAPI。相反,当需要使用登录数据中的加密密码时,Chromium会使用其内部AES库和解密的内部密钥来解密密码。然后,它就会跳转到登录表单
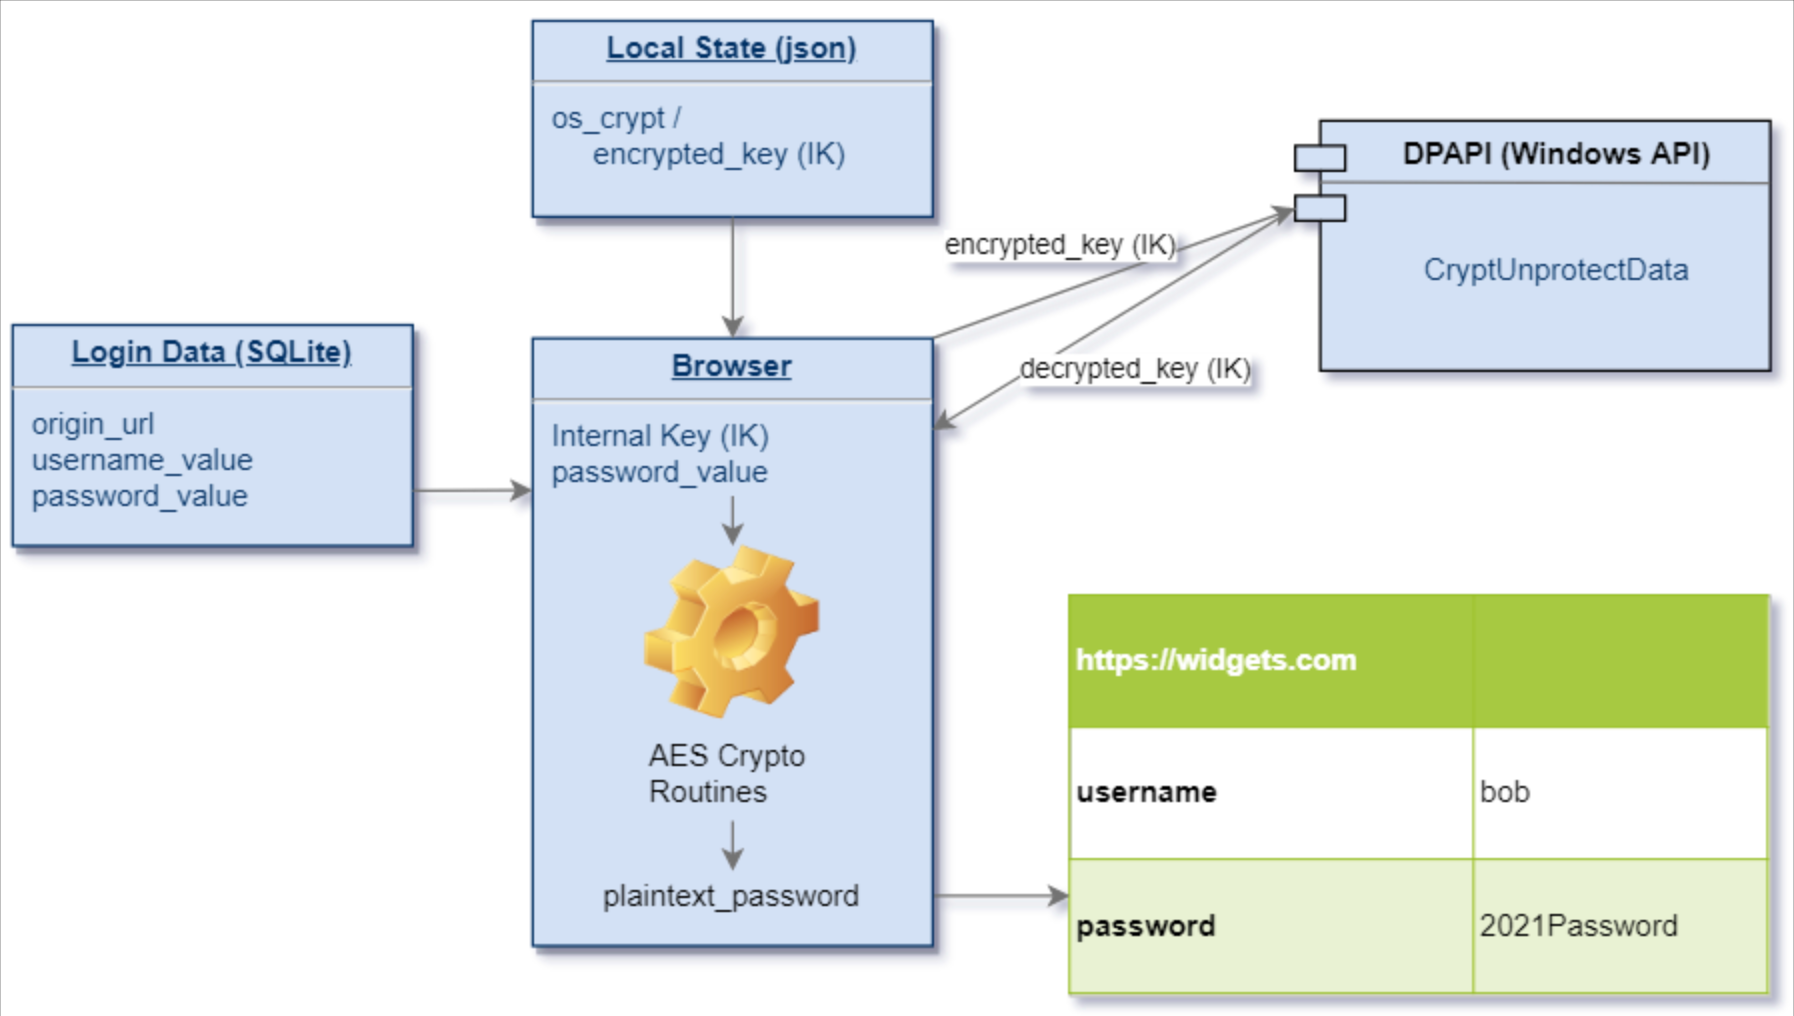
The major elements that have to do with decrypting the user’s login data are:
- Local State : A json file containing the browser’s current configuration. We only need one thing out of this file and that is the DPAPI encrypted, encryption key.
- Login Data : This is a sqlite3 database that contains the URL, username, and encrypted passwords the user wants to store.
- DPAPI : This is provided by Windows and is a simple interface to encrypt/decrypt data based on an RSA key kept by Windows for each user.
- AES (Advanced Encryption Standard) : In the browser this piece is provided by BoringSSL (an OpenSSL fork by Google) and is used when handling the password from Login Data.
解密流程总结
- 使用 AES-GCM 对密码加密
-
AES 密钥通过 DPAPI 加密保护
-
关键文件路径:
| 文件 | 路径 |
|---|---|
| 加密密码数据库 | C:\Users\用户名\AppData\Local\Google\Chrome\User Data\Default\Login Data |
| 加密密钥文件 | C:\Users\用户名\AppData\Local\Google\Chrome\User Data\Default\Local State |
- 解密流程步骤:
| 步骤 | 操作 | 说明 |
|---|---|---|
| 1 | 读取Local State文件 |
提取os_crypt.encrypted_key(Base64 编码) |
| 2 | 使用CryptUnprotectData解密该 key |
得到原始 AES 密钥(32 字节) |
| 3 | 读取Login Data数据库 |
查询logins表中的password_value字段 |
| 4 | 解析加密结构 | 包括前缀标志(如v10或v11)、nonce 和密文部分 |
| 5 | 使用 AES-GCM 解密密码 | 需要 AES Key + Nonce + 附加数据(optional) |
| 6 | 输出明文密码 | 成功获取用户密码 |
旧版 vs 新版 Chrome 解密对比
| 项目 | 旧版浏览器 | 新版浏览器 |
|---|---|---|
| 加密方式 | DPAPI (CryptProtectData) |
AES-GCM |
| 密钥来源 | 用户凭证自动管理 | 本地生成 AES 密钥,再用 DPAPI 加密 |
| 存储位置 | Login DataSQLite |
Login Data+Local State |
是否需要Local State |
❌ 不需要 | ✅ 必须读取 |
| 是否需要 AES 解密 | ❌ 不需要 | ✅ 必须进行 AES-GCM 解密 |
| 兼容性 | 只能在原用户/机器上解密 | 同样只能在原用户/机器上解密 |
| 安全性 | 较低 | 更高 |
| 技术复杂度 | 简单 | 复杂(需处理加密结构) |
解密工具
browser_password_decrypt/main.py at main · SOME-1HING/browser_password_decrypt
这个程序的主要功能是**解密并导出主流浏览器(Chrome、Edge、Opera、Brave)中保存的账号密码**。它通过读取 Windows 用户本地的数据文件,提取并解密保存的密码,最后导出为 CSV 文件。下面详细分析其结构和解密流程:
解密流程梳理
获取加密密钥
- 读取
Local State文件(JSON 格式),找到"os_crypt"->"encrypted_key"。 - base64 解码后去掉前 5 个字节(Chrome 特有的头)。
- 用 Windows API(CryptUnprotectData)进行解密,得到浏览器加密用的对称密钥(secret_key)。
拷贝数据库
- 将
Login Data(SQLite 文件)复制到临时文件夹,防止操作时被占用。
读取加密数据
- 连接
Login Data数据库,查询logins表,获取origin_url、username_value、password_value。
解密密码数据
- password_value 字段是二进制格式,结构如下:
- 前 3 字节:
v10或v11(加密算法版本标识) - 12 字节:初始向量(IV)
- 剩下的部分:密文
- 末尾 16 字节:GCM 的认证标签(tag)
- 使用 AES-GCM 解密:
- 密钥:上一步得到的 secret_key
- IV:cipher_text[3:15]
- 密文:cipher_text[15:-16]
-
tag:cipher_text[-16:](注意,脚本实现中没有单独处理 tag,但 AES-GCM 库会自动识别)
-
解密后获得明文密码。
总结
核心解密逻辑:
- 读取 Local State 文件,解密出主密钥(secret_key)。
- 复制 Login Data 数据库。
- 查询 logins 表,获取所有加密的 password_value。
- 对每一个密码字段,使用 AES-GCM 和 secret_key 解密,获得明文密码。
- 输出为 CSV 文件。
FireFox浏览器解密原理
Steps to crack Firefox passwords
There are three main steps to hack Firefox passwords.
- Identify the location of the saved usernames & passwords
- Load Network Security Services (NSS) library
- Decrypt the saved usernames & passwords
Step 1: Identify the location of the saved usernames & passwords
For the different operating systems, it is saved at different file locations as shown below:
Windows: C:/Users/<PC Name>/AppData/Roaming/Mozilla/Firefox/Profiles
Mac: ~/Library/Application Support/Firefox/Profiles
Linux: ~/.mozilla/firefox/Profiles
Upon opening the folder, you will see a few profiles inside. The respective profile belongs to the user who has logged into Firefox before.
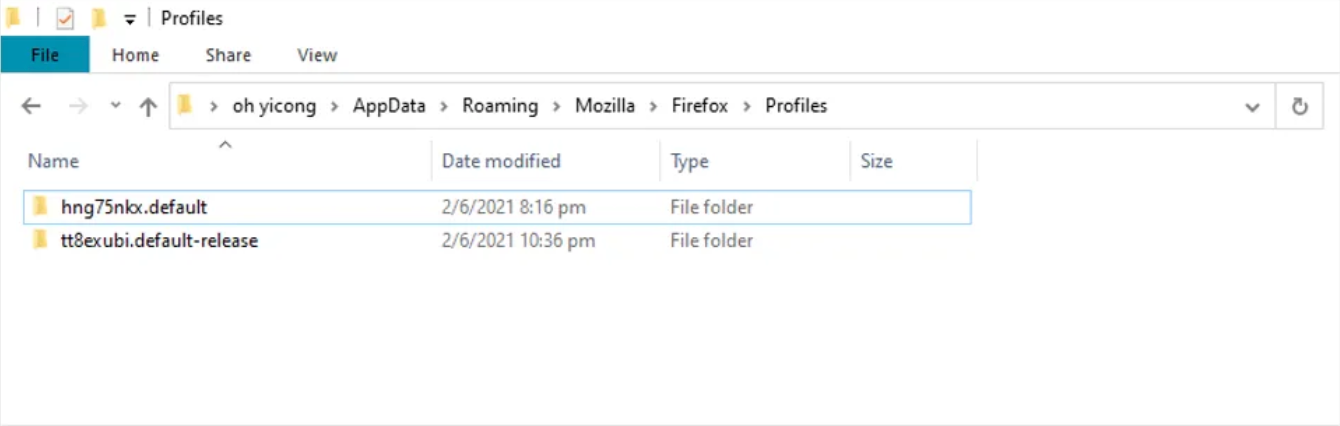
Two user profiles are shown in the Windows PC
Let’s go into any profile and find the logins.json file. After opening the file you will be able to see the following information.
{“id”:1,”hostname”:”https://login.ebay.com","encryptedUsername":"KoZIhAAAAAAAAAAAA","encryptedPassword":"HoktY1AAAAAAA","guid":"{92071111-e714-1192-a293-1222d2d5237}"
Congratulations, you have found three critical pieces of information :
- Hostname
- Encrypted username
- Encrypted password
Step 2: Load Network Security Services (NSS) library
The username and password are encrypted using PKCS #11 cryptography standard which uses your device as a “cryptography token” for encryption and decryption. Firefox has developed the NSS library to adopt this standard into their browser.
The following are the NSS library name for the respective OS.
It can be found easily in your Mozzila Firefox application directory.
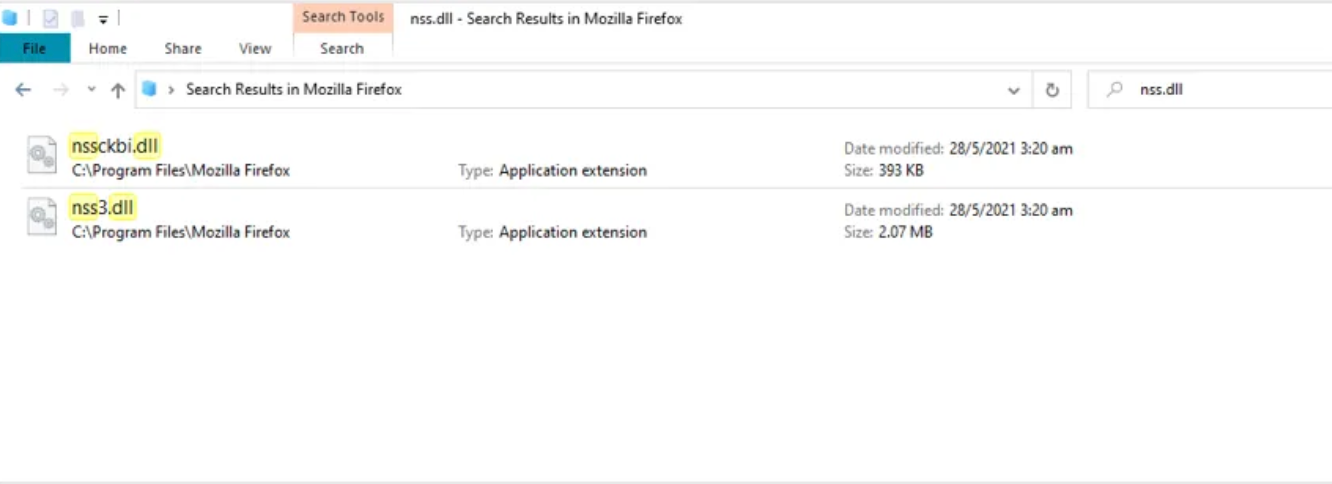
NSS library found in Windows PC
Step 3: Decrypt the saved usernames & passwords
After loading the library, it is time to use it for decryption. I hope that the following pseudocode provides you with an intuition of the entire decryption process.
#step 1: convert data (i.e. usernames/password)from base64 to string
data = b64decode(data64)
#step 2: pass the string data into the SECItem object as input data
input = SECItem(0, data, len(data))
#step 3: create a SECItem object to store the decrypted output data
create a output = SECItem(0, None, 0)
#step 4: perform PK11 decryption
PK11SDR_Decrypt(inp, out, None)
解密工具
firefox_decrypt/firefox_decrypt.py at main · unode/firefox_decrypt
该程序(firefox_decrypt.py)用于从 Firefox/Thunderbird 等 Mozilla 系浏览器的用户配置文件中提取和解密保存的账号密码。其解密逻辑梳理如下:
程序结构
- 配置与初始化
- 解析命令行参数,支持多种输出格式(文本、JSON、CSV、tabular、pass)。
- 自动寻找 Firefox/Thunderbird 等的 profile 目录。
-
读取 profile 目录下的
logins.json(新版本)或signons.sqlite(老版本)作为密码存储文件。 -
NSS 加载与初始化
- NSS(Network Security Services)是 Mozilla 用于加密/解密的核心库。程序通过 ctypes 动态加载 NSS(libnss3.so/dll/dylib)。
-
利用 NSS API 对 profile 进行初始化、解锁(如有主密码则提示输入)、最终关闭。
-
提取加密数据
-
从
logins.json或signons.sqlite提取字段信息,包括:- url/hostname
- encryptedUsername
- encryptedPassword
- encType(标记是否加密)
-
解密流程
- 对于 encType 标记为加密的项,使用 NSS 调用
PK11SDR_DecryptAPI 对字段进行解密。 - NSS 解密前需要主密码(如设置了),并会先验证主密码。
-
解密失败会有错误处理(可选跳过/终止)。
-
输出
- 解密成功后,将 url、username、password 以所选格式输出。
- 支持导出到 pass(passwordstore.org)等第三方密码管理工具。
解密流程梳理
1. 选择配置文件目录 - 解析命令行参数,自动查找 profile 目录。 - 如果有多个 profile,提示用户选择(或用命令行指定)。
2. 读取密码数据文件 - 优先读取 logins.json(新格式),否则用 signons.sqlite。 - 提取所有记录,包括加密的用户名和密码。
3. 初始化 NSS 及认证 - 动态加载 NSS 库(依赖系统环境,自动寻找)。 - 用 profile 路径初始化 NSS。 - 检查 profile 是否设置主密码(Primary Password),如有则提示用户输入并验证。
4. 解密用户名和密码 - 对每条记录,判断 encType 是否需要解密。 - 用 NSS 的 PK11SDR_Decrypt 解密 encryptedUsername 和 encryptedPassword。 - 解密失败时可选择跳过或终止。
5. 输出结果 - 将「网站、用户名、密码」输出为文本、JSON、CSV、Tabular 或 pass 格式。
总结
- 自动定位配置文件和 NSS 库。
- 读取并提取加密的账号密码。
- NSS 加载并初始化,必要时解锁主密码。
- 用 NSS API 逐条解密用户名和密码。
- 输出指定格式的账号信息。